One of the most commonly used file types is the Word document, or Docx. It is used in all departments like finance, HR, technical, and everything around those. It represents content in an organized way that makes it easy to read and edit.
In this article, we dissect a Word document, find out what it looks like behind all the fancy GUIs, and how we can edit the content from the main files directly.
Introduction #
Before we get started, create a new document and add some basic content inside. For example, I used Google Docs to create a new file with the content: Dissecting Word Documents.
Download the Docx file and save it in an empty directory.
Next, simply unzip the Docx file itself. You can do that by running the command:
unzip ./file.docxYou should see 1 file and 2 directories:
[Content_Types].xmlfile: This file defines the files found/included in the complete Docx file_relsdirectory: This directory defines the relationships (rels for short) between the different files in the complete document fileworddirectory: This is the main directory which includes all the content of the file, from the actual text to the styles, and even the images
In this article, will focus mainly on the word/document.xml file. This file includes the actual content of the document, such as the text. We will also quickly go through a couple of other files/directories.
Viewing The Content #
Open the extracted directory in your favorite Code-Editor/IDE and open the document.xml file from inside the word directory.
To better understand what is happening, you can do 2 things:
- Format the file: The file itself is XML, a markup language, simply right-click on the content and click on “Format Document”
- Open the file side-by-side with the actual document
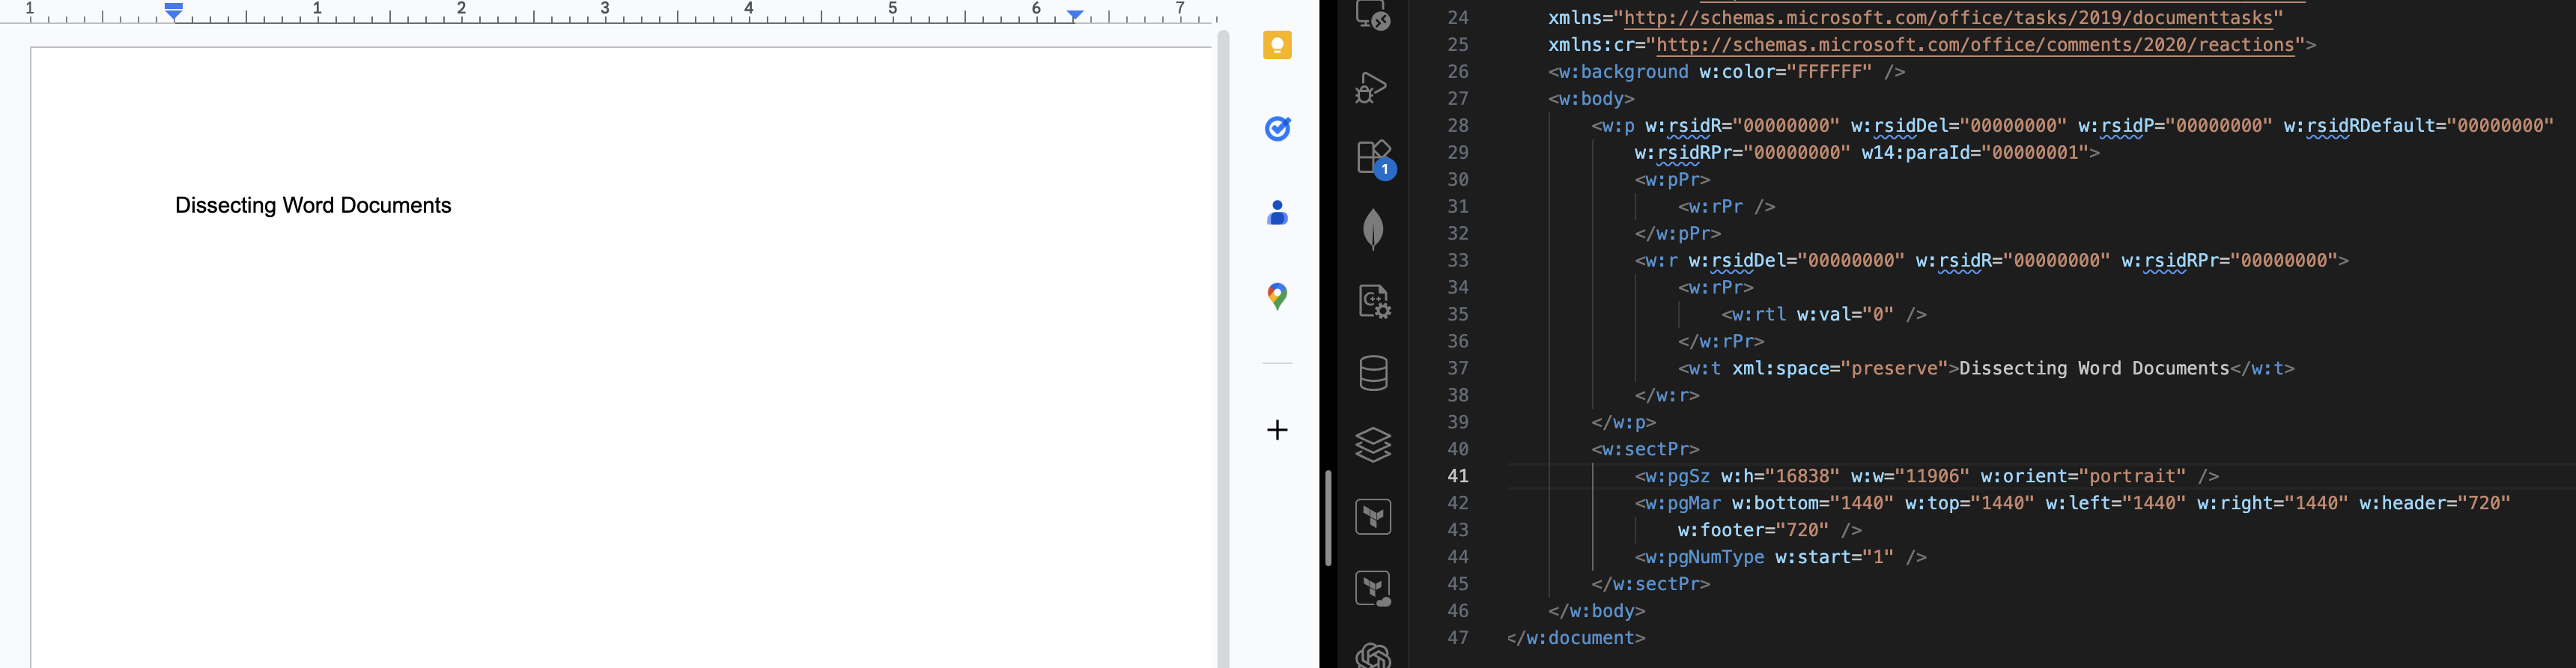
As you can in the image above, the exact phrase written in the GUI of the Docx file “Dissecting Word Documents” can be seen in one of the sections in the XML on the right (line 37). All of the file content that is seen in the GUI is inside the w:body tag.
Changing The Content #
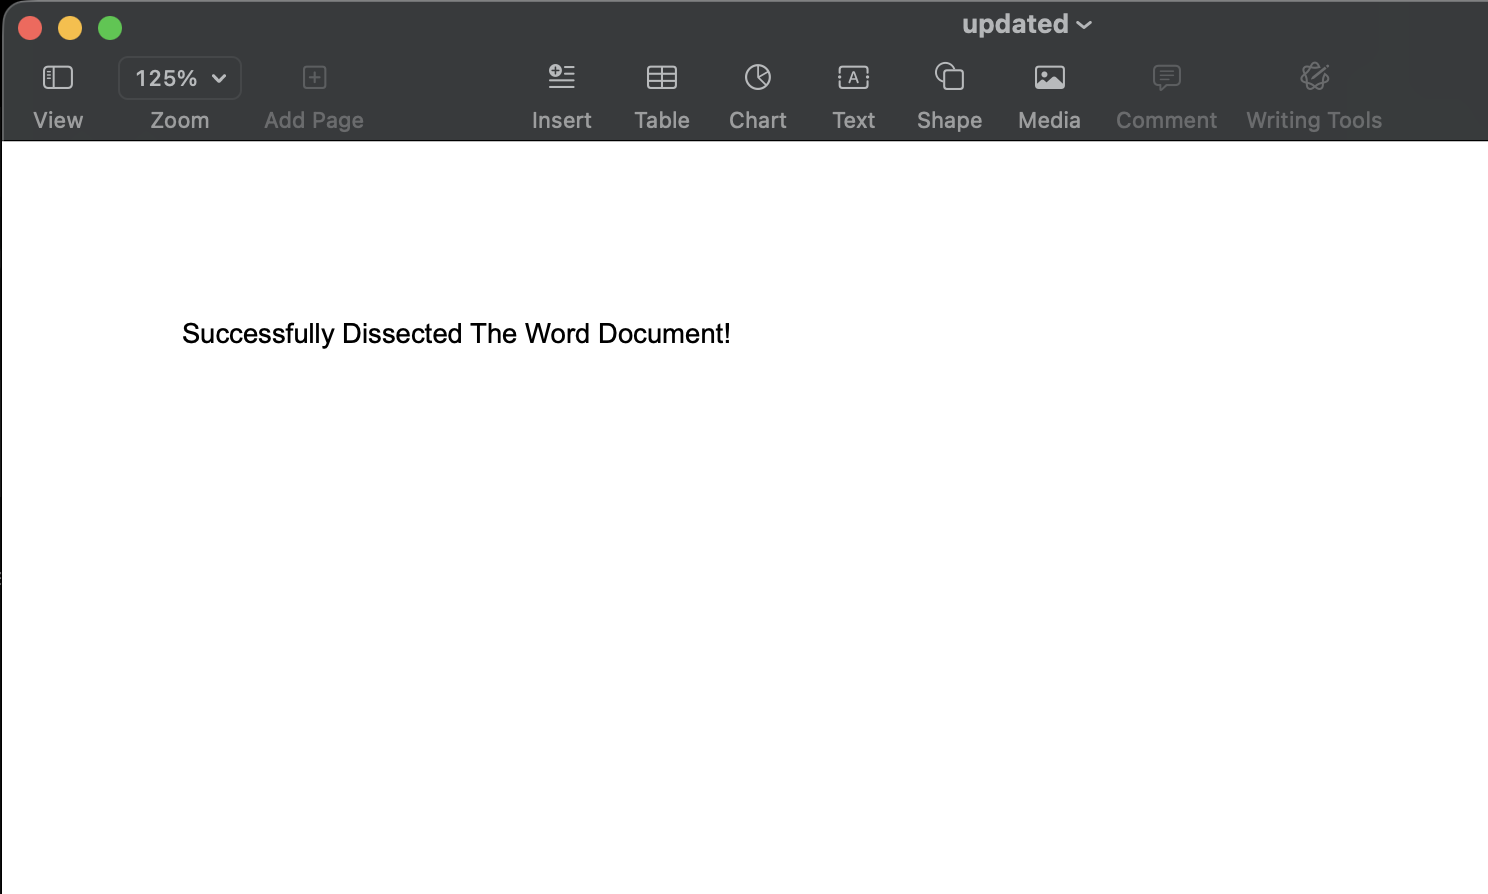
We can change the content of the file by directly changing the document.xml file. For example, change the text “Dissecting Word Documents” to something like “Successfully Dissected The Word Document!”:
...
<w:r w:rsidDel="00000000" w:rsidR="00000000" w:rsidRPr="00000000">
    <w:rPr>
        <w:rtl w:val="0" />
    </w:rPr>
    <w:t xml:space="preserve">Successfully Dissected The Word Document!</w:t>
</w:r>
...
To view the document in the GUI (e.g. Microsoft Word) save the file and compress the files:
zip -r updated.docx _rels word \[Content_Types\].xmlThe command above will take the files and compress them to a new file updated.docx.
Open the updated.docx file in the GUI and you should see the new content!
We can also add some new content. Open the document.xml file again, copy the entire <w:p... tag and paste it right below it and change the text, for example:
...
<w:p w:rsidR="00000000" w:rsidDel="00000000" w:rsidP="00000000" w:rsidRDefault="00000000"
    w:rsidRPr="00000000" w14:paraId="00000001">
    <w:pPr>
        <w:rPr />
    </w:pPr>
    <w:r w:rsidDel="00000000" w:rsidR="00000000" w:rsidRPr="00000000">
        <w:rPr>
            <w:rtl w:val="0" />
        </w:rPr>
        <w:t xml:space="preserve">Successfully Dissected The Word Document!</w:t>
    </w:r>
</w:p>
<w:p w:rsidR="00000000" w:rsidDel="00000000" w:rsidP="00000000" w:rsidRDefault="00000000"
    w:rsidRPr="00000000" w14:paraId="00000001">
    <w:pPr>
        <w:rPr />
    </w:pPr>
    <w:r w:rsidDel="00000000" w:rsidR="00000000" w:rsidRPr="00000000">
        <w:rPr>
            <w:rtl w:val="0" />
        </w:rPr>
        <w:t xml:space="preserve">Part 2 of the Update</w:t>
    </w:r>
</w:p>
...
Save, rerun the compression command, and open the file in the GUI:
zip -r updated.docx _rels word \[Content_Types\].xml
Dealing With Different Content Types #
We will now take a look at different content types in the Docx file. Head back to the original document and do the following:
- Add a “Title” to the page
- Add a bulleted list with 3 items
- Add bold text
- Add italic text
- Add text with a larger font size (e.g. 30)
- Add an image
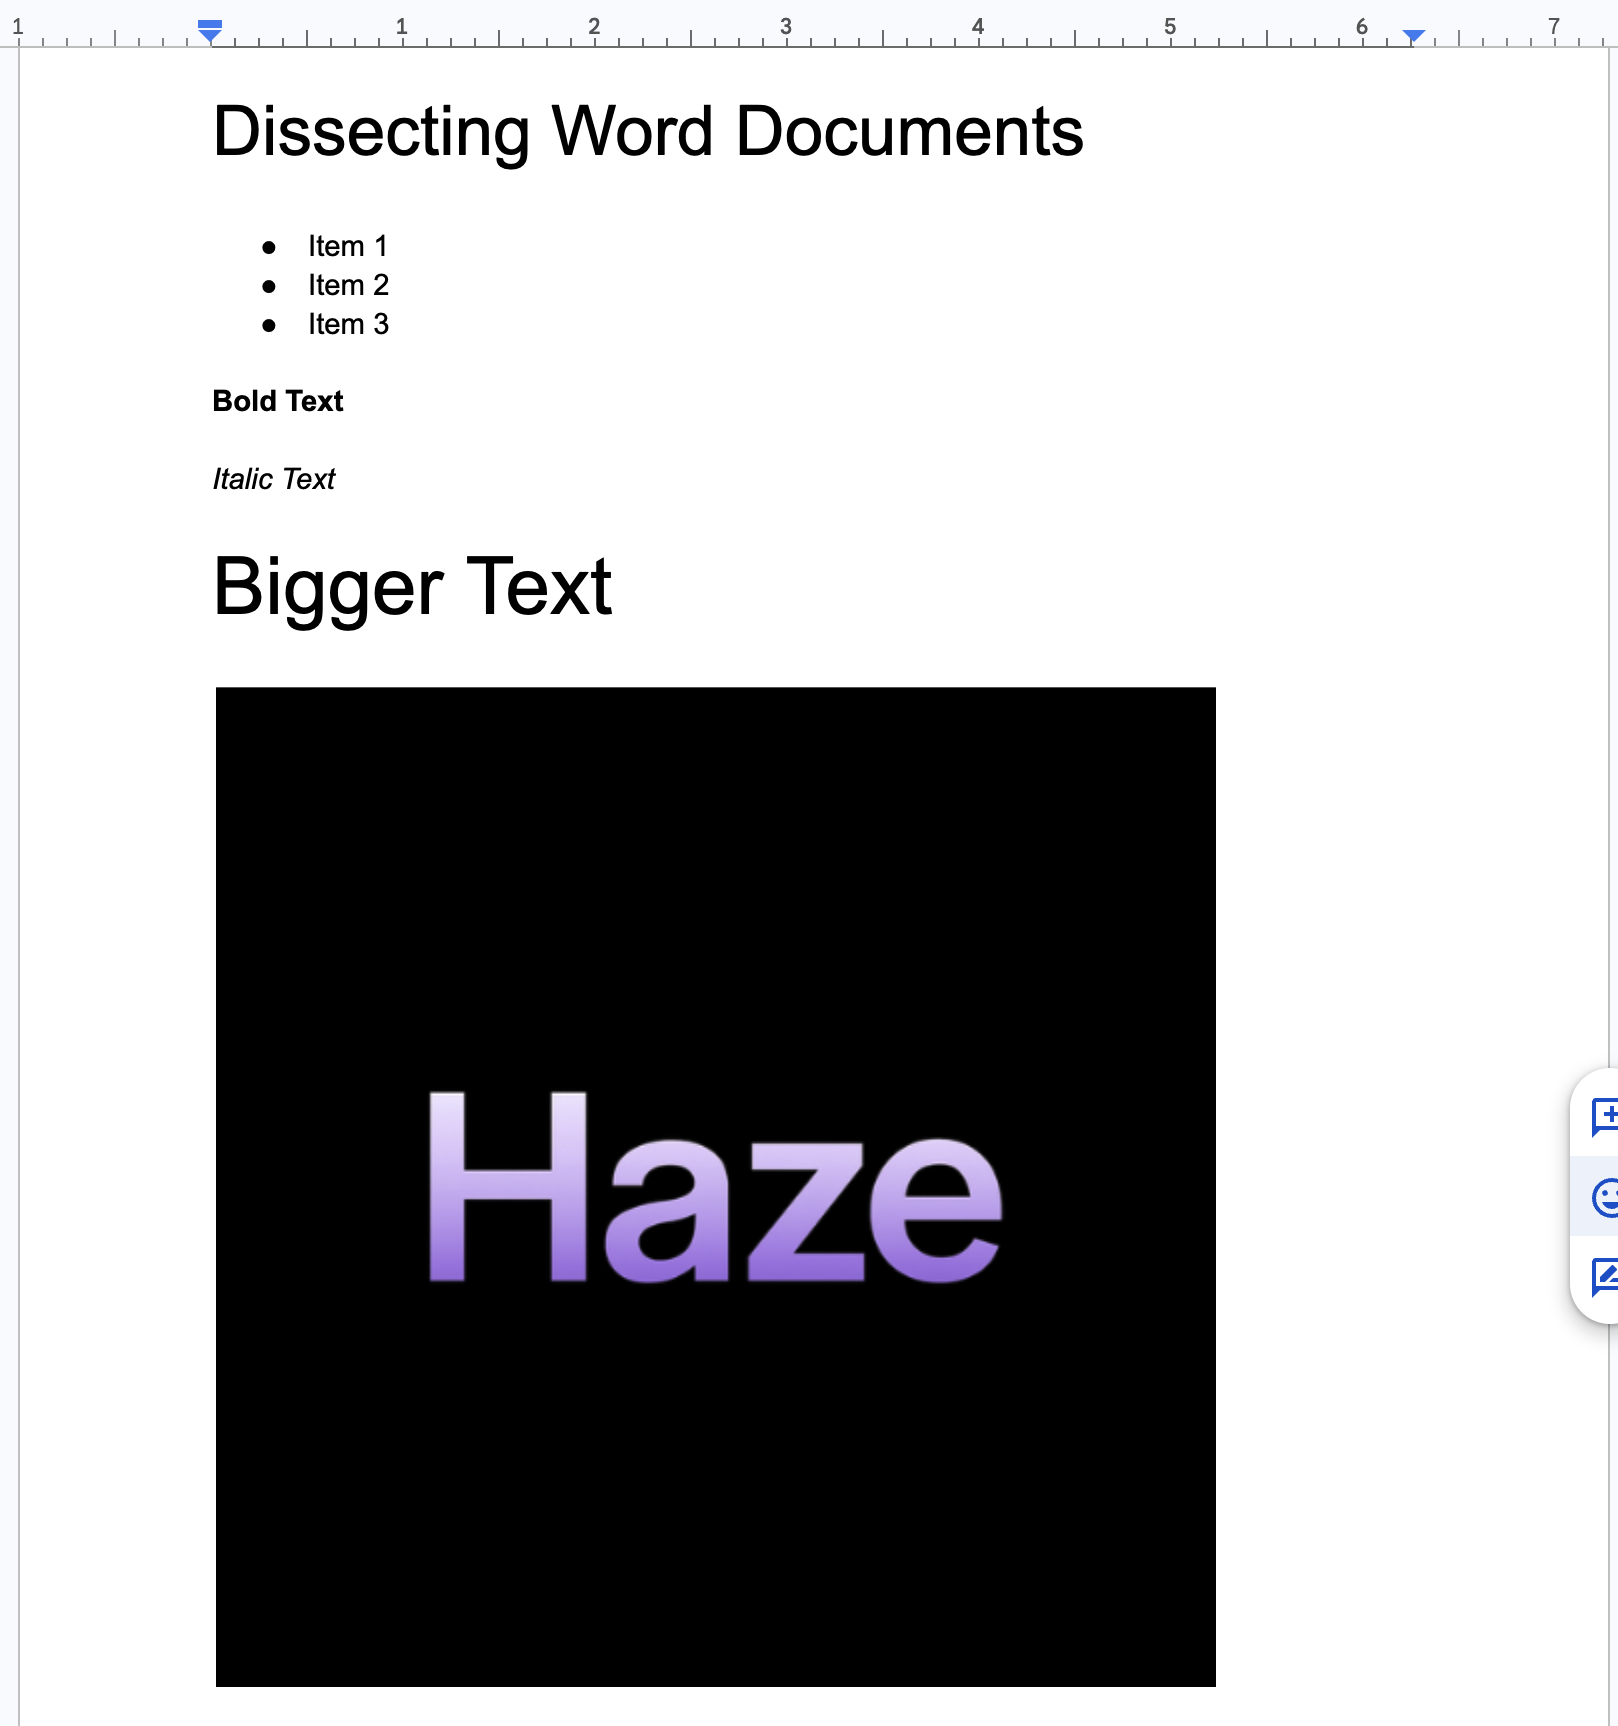
This is how my file looks like:
Download and unzip the file like we did previously:
unzip ./file.docxOpen the document.xml file again and let us go through each element by iterating around the w:p tags, where each one contains an element of the content, such the text or bullet point.
The first element we encounter is the title that says “Dissecting Word Documents”. If you look at the w:p you will 4 see different sections inside it, the first is the w:pPr tag, this includes a tag that specifies the style of this element, which is w:val="Title"
<w:pStyle w:val="Title" />To understand this style, head into the styles.xml file and search for Title. You will see a w:style tag where the ID (or w:styleId) is set to Title. Inside it, we see a bunch of configs, if we look near the end of it, we will see the following:
<w:rPr>
    <w:sz w:val="52" />
    <w:szCs w:val="52" />
</w:rPr>
This sections sets the configs of the text itself that applies this style (Title). It can be a custom font size, color, font family, and more.
In our case, this sets the font size of this specific styling element to 52, which is double what we set in the GUI, 26pt.
The next w:p section has no value since it is an empty line.
Next, we start seeing the bulleted list. The 3 items we inserted all have the same XML, with the exception of the text itself of course (e.g. Item 1, Item 2, …).
<w:p w:rsidR="00000000" w:rsidDel="00000000" w:rsidP="00000000" w:rsidRDefault="00000000"
    w:rsidRPr="00000000" w14:paraId="00000003">
    <w:pPr>
        <w:numPr>
            <w:ilvl w:val="0" />
            <w:numId w:val="1" />
        </w:numPr>
        <w:ind w:left="720" w:hanging="360" />
        <w:rPr>
            <w:u w:val="none" />
        </w:rPr>
    </w:pPr>
    <w:r w:rsidDel="00000000" w:rsidR="00000000" w:rsidRPr="00000000">
        <w:rPr>
            <w:rtl w:val="0" />
        </w:rPr>
        <w:t xml:space="preserve">Item 1</w:t>
    </w:r>
</w:p>
Inside the w:pPr section, it is specified that this element is a list, indicated by the w:numPr object. Inside that is an element w:numId which has a value of 1. This specifies that it is a bulleted list and not a numbered list, a numbered list has a value of 2. Change the value of one of the items, for example Item 2, to 2 instead of 1, compress the file and open it in the GUI.
zip -r updated.docx _rels word \[Content_Types\].xml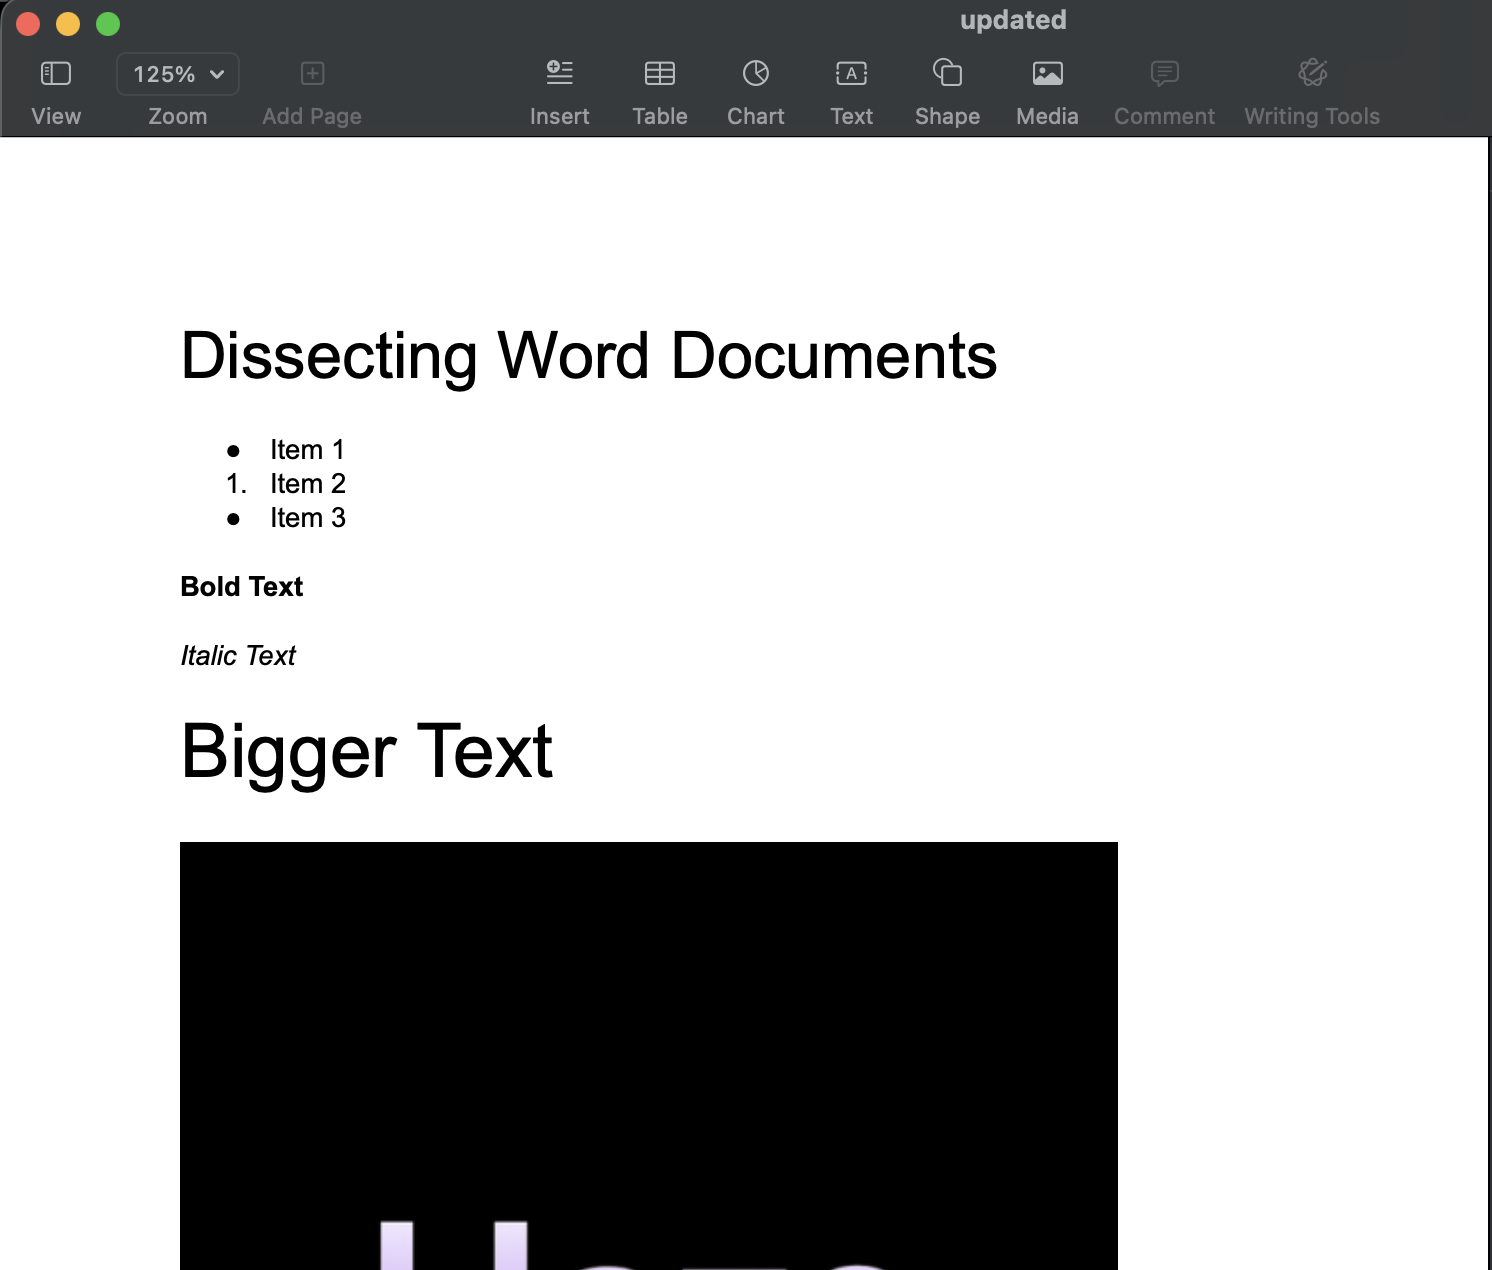
Moving on, the next element is the Bold Text. Inside the w:r where the text is included, we see the section w:rPr which is a w:b element, representing bold text, with a value of 1. This element defines that the text in this section is bolded. If you change the value from 1 to 0, save, compress, and reopen the file. The text will not be in bold.
<w:r w:rsidDel="00000000" w:rsidR="00000000" w:rsidRPr="00000000">
    <w:rPr>
        <w:b w:val="1" />
        <w:bCs w:val="1" />
        <w:rtl w:val="0" />
    </w:rPr>
    <w:t xml:space="preserve">Bold Text</w:t>
</w:r>
The next section is the Italic Text. Again, we see an element inside the w:r and inside the w:rPr section. The element is w:i and has a value of 1. Similar to the Bold Text section, if we change the value from 1 to 0, the text will not be in italic form.
<w:r w:rsidDel="00000000" w:rsidR="00000000" w:rsidRPr="00000000">
    <w:rPr>
        <w:i w:val="1" />
        <w:iCs w:val="1" />
        <w:rtl w:val="0" />
    </w:rPr>
    <w:t xml:space="preserve">Italic Text</w:t>
</w:r>
The next section is the section that has bigger text. What we did here is we changed the font size to 30pt from the GUI. As we can see, again, inside the w:r section and inside the w:rPr section, there is an element w:sz with a value of 60. As we saw previously, the font size here is double what we saw in the GUI. Therefore 60 here is equivalent to 30pt.
<w:r w:rsidDel="00000000" w:rsidR="00000000" w:rsidRPr="00000000">
    <w:rPr>
        <w:sz w:val="60" />
        <w:szCs w:val="60" />
        <w:rtl w:val="0" />
    </w:rPr>
    <w:t xml:space="preserve">Bigger Text</w:t>
</w:r>
For the final section, we have a PNG image. Inside the w:r section, we have a w:drawing section which has the image information. If we look inside, we should see an element a:graphic which represents the image. Inside that, we have an element that references the image:
<pic:nvPicPr>
    <pic:cNvPr id="0" name="image1.png" />
    <pic:cNvPicPr preferRelativeResize="0" />
</pic:nvPicPr>
The image filename is defined as image1.png. If we look inside the word directory, we should see a media/. directory, inside that, we should see the image we uploaded with the filename image1.png.
To change the image, simply replace the existing file with a new image but with the same name image1.png. In my case, I replaced it with one of the pictures I used in this article. Next, save, compress, and open the file
zip -r updated.docx _rels word \[Content_Types\].xml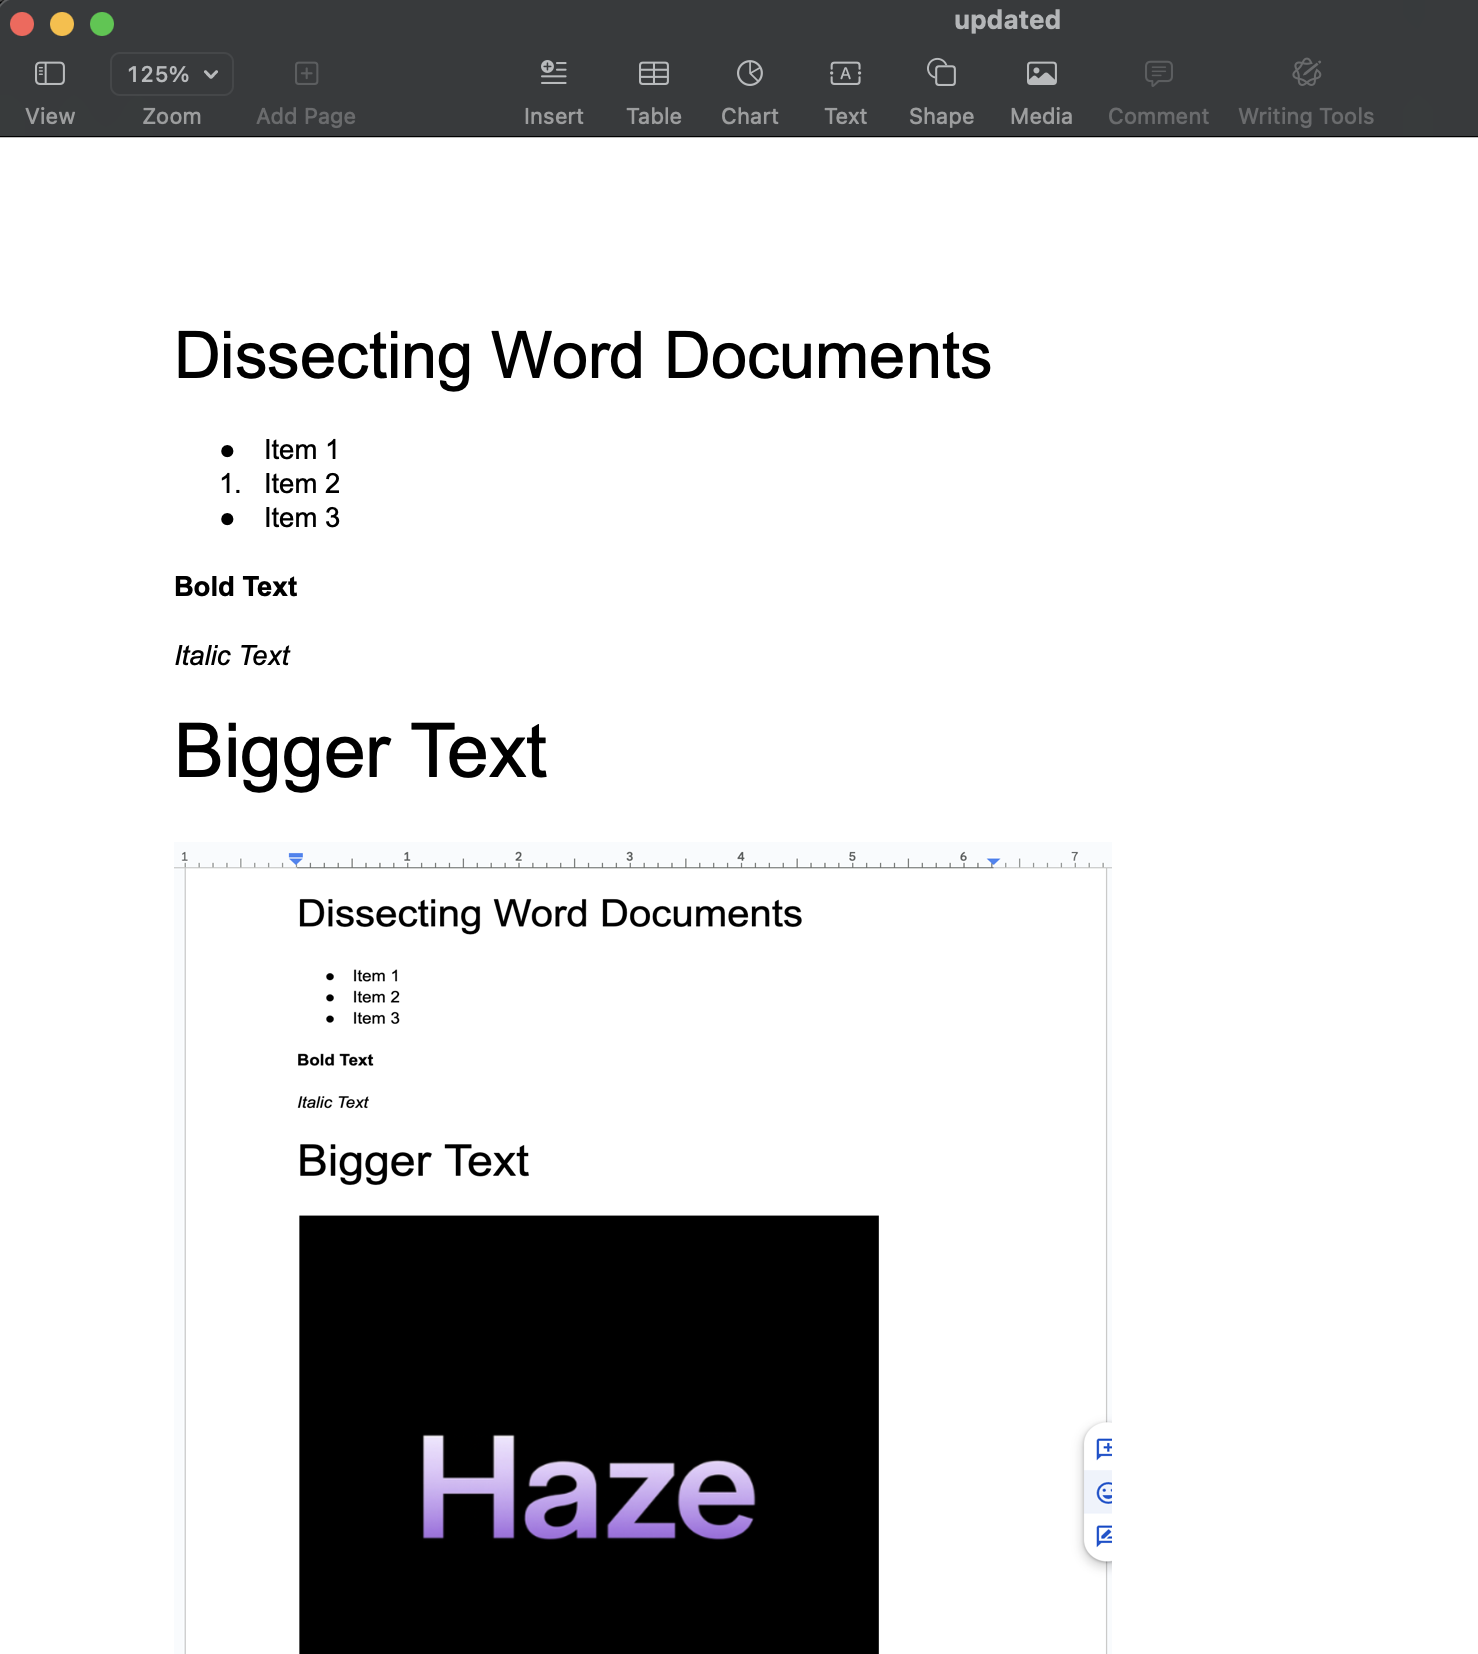
Conclusion #
Docx files are simply XML and data files organized in a specific way. GUIs like Microsoft Word, Google Docs, and Mac Pages are intelligent XML readers that shape these files into a better looking final output.
We saw how we can customize text, images, and even view general styling configurations.
In an upcoming tutorial, we will create a very simply Golang application to allows us to add data and generate a new Docx file from simple functions, so stay tuned!
I hope you learned something and I hope to see you in the next one!